Geocaching is a fun activity that can be done anywhere in the world and it appeals to all ages – from preschoolers to retirees. You can do it alone, with the family, in a group. It can get you outside and it can get you to visit places you wouldn’t ordinarily explore.
We created our Geocaching for Beginners Tutorial to help you get started with this fun hobby that you can do anywhere in the world!
What is Geocaching?
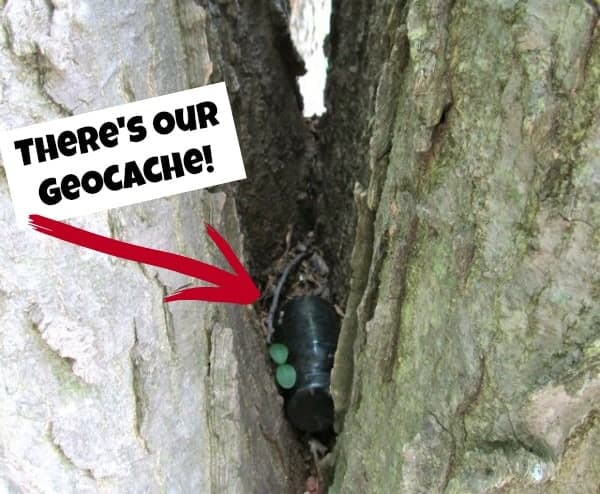
What is geocaching, you ask? Basically, it’s a treasure hunt that you do with the help of a smartphone or a GPS unit. Someone hid a package of some sort and it’s your job to hunt it down!
The process is pretty straightforward. Using an app on your phone (or, alternately, Geocaching.com from a computer) you find a general area where someone has hidden a geocaching treasure for you to find. Using the app (or the website), you choose a “cache” and then obtain the coordinates. Your smartphone (with a geocaching app) or your GPS unit can then guide you on your search.
We used to use a GPS unit (years ago) but now I use my smartphone (an iPhone). I will say that I greatly prefer geocaching with my smartphone and our GPS unit has long since been retired. I always have my phone with me and I don’t have to plan my geocaching activities in advance when I use my phone.
The best part about this hobby? It’s a REALLY cheap activity that you can do anywhere – at home or on the road. Essentially, after you pay for the app, geocaching is a FREE activity.
I recently went on a geocache hunt and documented my process so I could show you how fun (and easy) it is.
How to Get Going – Geocaching for Beginners:
If you want to use your phone to geocache, you will need an app (or you can sign into the Geocaching.com site from a browser on your phone). You can find a variety of different apps to try at the App Store or Google Play. Just search “geocaching” in the app store to find the list.
There are a few things to be aware of – no matter which app you use, it’s likely that all of your geocache data comes from Geocaching.com. The apps I am going to talk about are API partners with Geocaching.com which means the apps connect back to data at Geocaching.com. The second thing is that you will have to pay a fee for the Premium Level if you intend to hunt more than 3 caches in one day or want some of the advanced features, regardless of which app you use (more on that later).
There used to be a one-time-fee “paid” version of the Groundspeak app (shows up as Geocaching in the app store). If you are a former geocacher and haven’t gone on any hunts lately, you’ll want to read this for updates on the geocache app changes and fees.
Start off by signing up for the Geocaching Experience
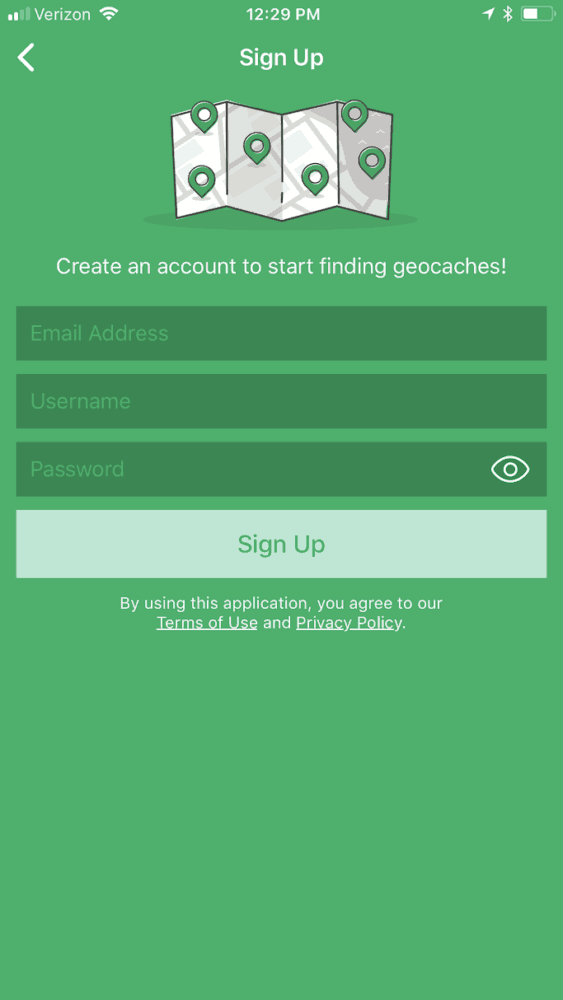
First off – you need to sign up for a free account at Geocaching.com. They’ll ask you for some very basic info and you’ll create your own username for geocaching.
Get a Geocaching App for Your Smartphone
After you create a free account at Geocaching.com, I’d recommend that you go ahead and get the Geocaching app (a free app). You can find it with your phone at the App Store (iPhone) or via Google Play (Droid). Geocaching offers a Basic Level (free) and a Premium Level (monthly fee). You can totally get started using the Basic Level.
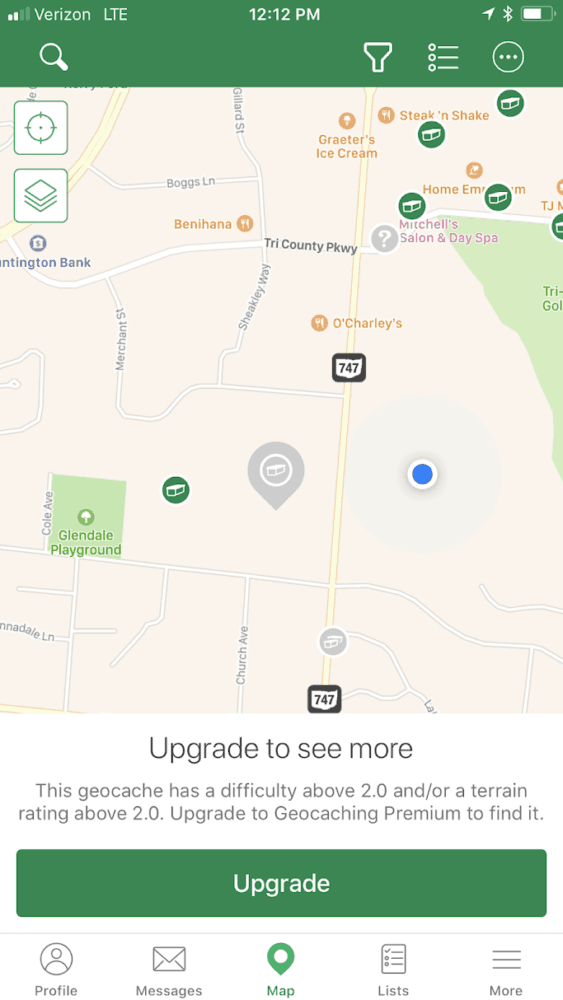
Please note: To have the app find a location near you, you may have to give the app permission to use your location. If the app can’t find you due to restrictions with your phone settings, you should get a pop-up notice from your phone asking if you’d like to turn on your GPS location. You will have to do that for this to work. Once the GPS kicks in and finds your location, the app will automatically show you the caches around you (shown as green and gray dots in the pic above). The green dots are geocaches you can find with just the Basic Level. The geocaches that are gray are only available via the Premium Level.
Some of the tougher caches and features are not available from within the Basic Level with the Geocaching app. As you can see in the screenshot below, there’s a cache I can’t get the info for from my Basic Level (shows as the gray teardrop below). While I can see that it’s there, I can’t do the cache without paying for the Premium Level. Womp. Womp.
Do You Need to Pay for a Premium Level Geocaching App?
In addition to having access to just some of geocaches in the Basic Level, the choices you have at the bottom of the screen are limited with the Basic Level. You can view your Profile, can send Messages, and can view the Map. Lists are for Premium Level subscribers. More includes “drafts” so you can finish a cache later and the rest of that menu is not applicable in finding a cache.
I will admit that I found the grayed out caches frustrating. In addition, I missed the Lists feature that would give me info on the caches around me (you can get that feature in Premium Level now). So I decided to try a different app to see if some of the features I want can be found using another app.
What is Cachly and Why Would I Want to Use It?
In my frustration with the “new to me” Geocaching app and its Basic Level offerings, I decided to try a different app for geocaching. I went to the app store, searched “geocaching”, and decided to try out Cachly.
Cachly is an API partner with Geocaching.com so it draws that same info about your cache. If you’re following these instructions, you previously created an account with Geocaching.com and you can use it to sign into Cachly. All of your data and finds, regardless of which app you use, will be held at Geocaching.com.
Cachly is a paid app ($4.99 when I downloaded it) but that was the only fee, assuming I wanted to continue to just use the Basic Level of Geocaching.com (which I am ok using at this time).
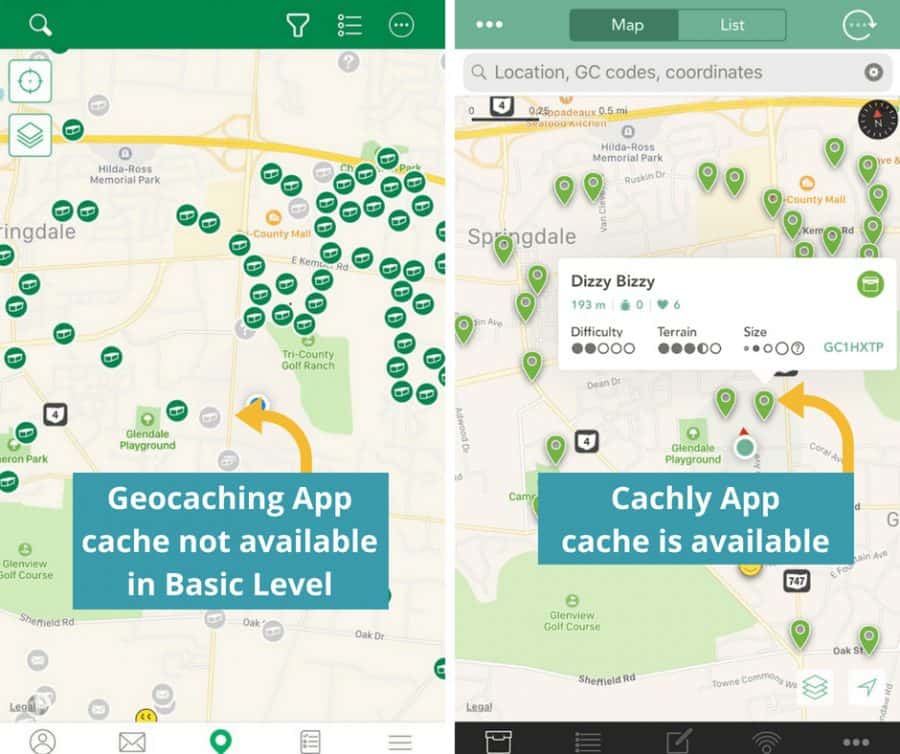
As you can see, it looks very similar. One thing I immediately noticed was some of the grayed out caches in the Geocaching app are available to me in the Cachly app. The Dizzy Bizzy cache that is highlighted above was a grayed out cache within the Geocaching app.
You should know that with the Basic / Free level you are limited to doing three caches per day. Cachly is included in that limit.
I decided to stick with Cachly because I could get all the info on the caches around me and I didn’t intend to do more than three caches that day.
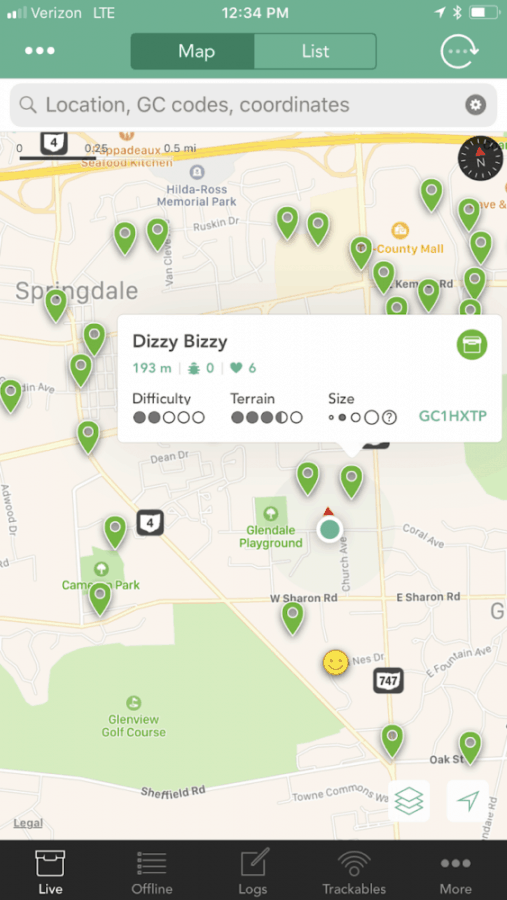
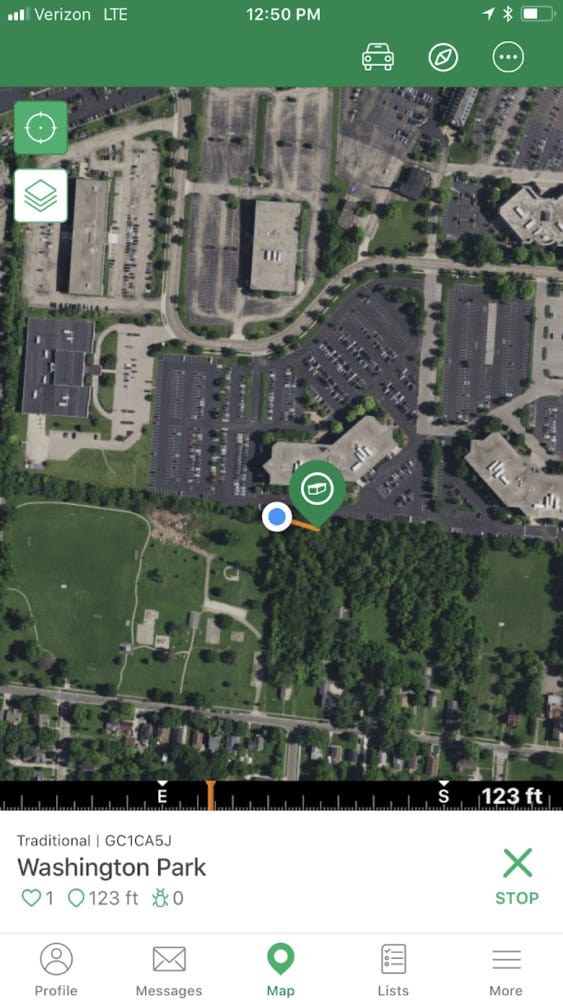
What you see on the screen (pictured above):
At the top of the screen, you have the option to see nearby caches as a List (which will show you a list of nearby caches) or by Map (as seen above). The circular icon is a refresh for your location.
The Name of the Cache: Hover over a cache and you’ll see more details, starting with the Name of the Cache. See the “Dizzy Bizzy” detail window for an example.
Difficulty and Terrain: The person who creates and hides the geocache will grade it for difficulty (as in how tough of a puzzle) and terrain (is it an easy walk or a steep climb) so you can decide if this is a hunt you want to pursue. Keep in mind this is decision made by the creator of the cache. What is easy to one person may be harder for another.
The distance and direction from your current location to the cache is listed under the name.
Size: The person who created this cache can give you an indication of the size of the piece you’re looking for here. Caches can be micro and tiny (the size of your finger tip) or large (a big box).
The Bug Icon: The icon that looks like a bug denotes a “tracking bug”. A tracking bug is a physical item that is in the cache itself. The tracking bug has an identifying number on it. If you find a tracking bug in your cache, you can enter the tracking bug’s number into the Groundspeak app (see the “Trackables” button the bottom right of the screen) to see where this “bug” has been. You can take the bug with you when you leave and deposit it in another cache somewhere else – just be sure to log your trackable “find” when you take it (so no one else hunts for it) and then list the bug’s new location after you place it in another cache (all done within your app or online at the Geocaching site). You might want to wait until you have done a few caches before you get into the “tracking bug” game.
Cache Identifier: “GC4ZOGF” is the unique code for this particular geocache.
Choosing Your First Geocache:
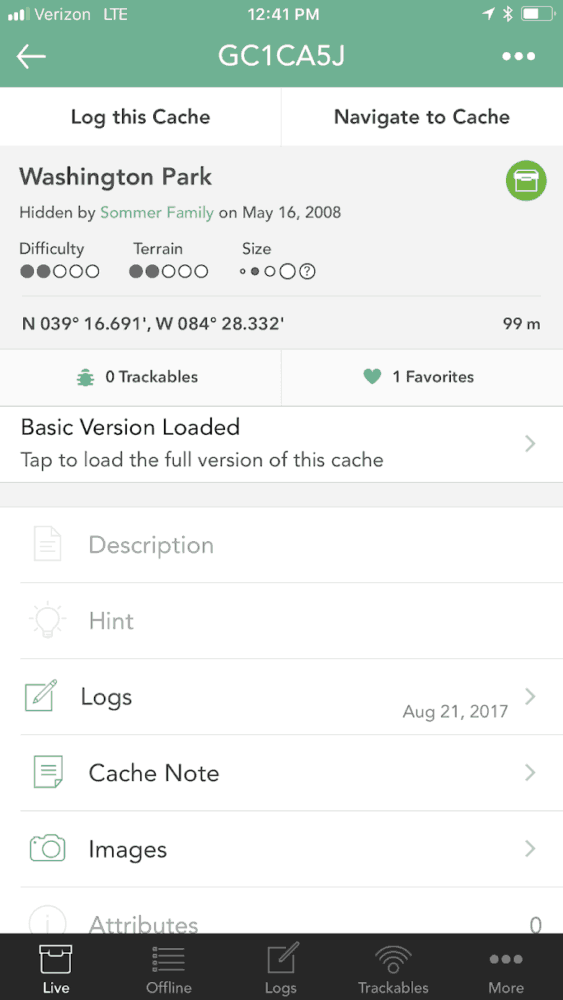
For this example, I chose a geocache in a park that was close to me. The geocache I chose now appears on the screen with details specific to that cache.
On this screen you can see: the info that was on the first screen as you hovered over the location, the date it was originally hidden (by the person who started this cache), as well as:
- Description: a nice summary of the geocache, sometimes including what kind of cache you’re looking for (big, small, locked, etc.) and it may even give you some interesting info on the park or location where you’re hunting.
- Hints: if you’re stumped, take a look at the hint
- Logs: fellow cachers will log their experiences such as found, can’t find it, it’s gone, etc. (may contain spoilers)
- Notes: a place for you to put your own notes for future review by you
- Images: pictures that fellow cachers have uploaded (may contain spoilers)
Finding Your Geocache:
After you pull up your chosen cache and read the description, you’re ready to hit “Navigate to Geocache” to get started.
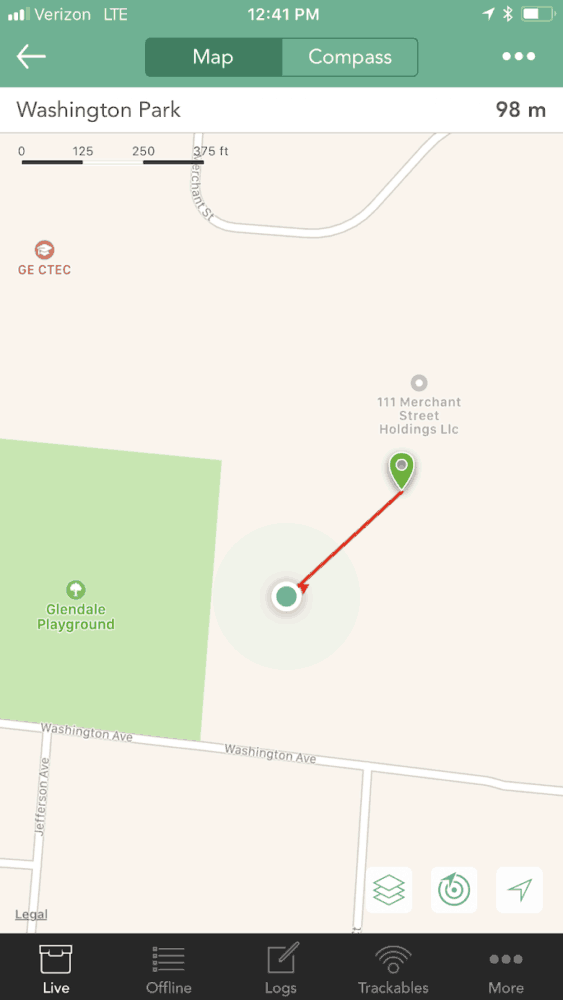
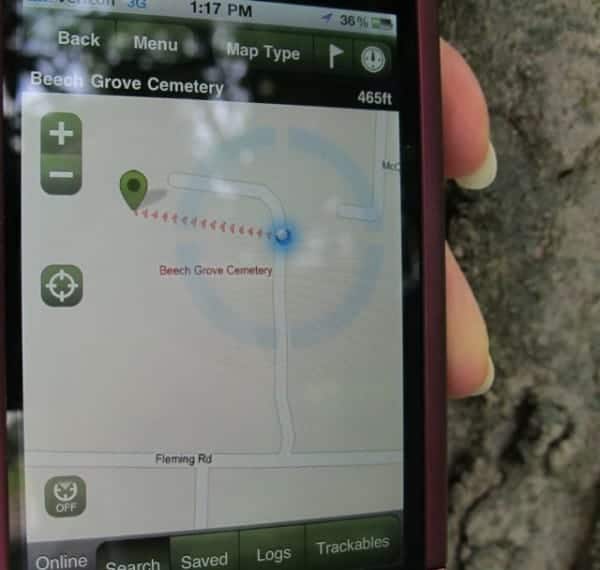
After you hit the navigate button you’ll see a map of the location. The dot is your current location and the green map marker / teardrop is the approximate location of the cache.
As you navigate your way towards the cache, the dot will approach the cache marker (all in real time). If you’re going the wrong way you’ll notice that your dot is getting farther away (or perhaps going to the side of the cache marker).
When you do finally get right up to the cache marker per your phone, put your phone away and start looking for the cache. Keep in mind that your coordinates are approximate and your phone will get you close to the real location but may not be completely accurate. You will have to hunt in the general vicinity for your cache and may have to come back to your phone for a re-check.
Caches will not be buried but may be on the ground, in trees, attached to metal items with magnets, be attached with cords, etc. Keep your eyes open and look all around, up and down.
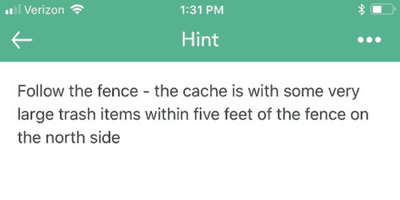
If you are completely stumped and can’t seem to find your cache, come back to your phone and click on “Hint”. Keep in mind that the hint section does contain some pretty detailed info so don’t use this until you need it.
You can also look at “Photos” to see what other people have left you as a clue but, again, these might contain spoilers so be aware.
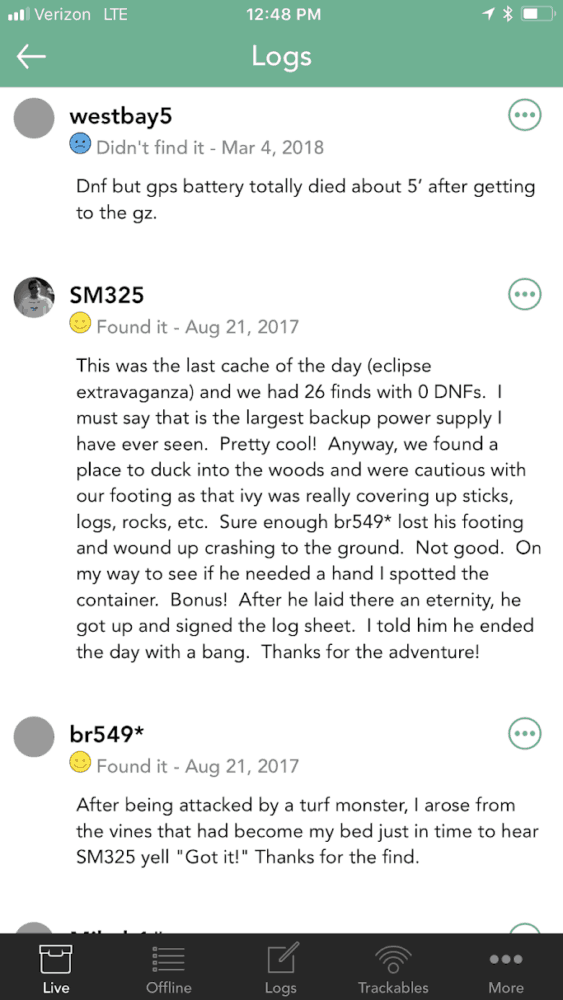
Recent Logs will tell you when the cache was last found OR if people are having trouble finding it. Caches are often in the woods and can be carried off by animals, blown out of place, accidentally discarded, etc. I don’t usually look at the logs unless I’m having trouble finding the cache.
What to Do After You Find a Geocache:
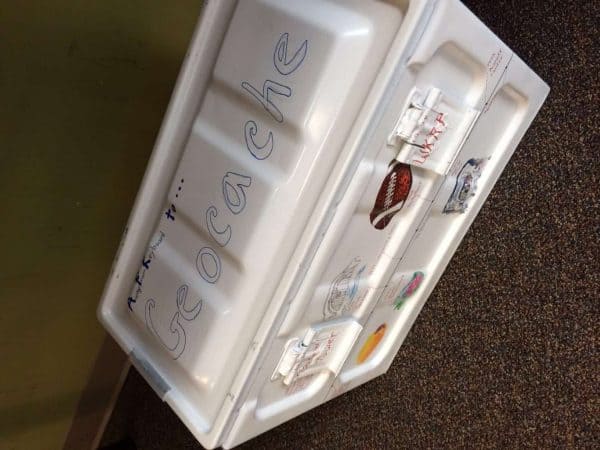
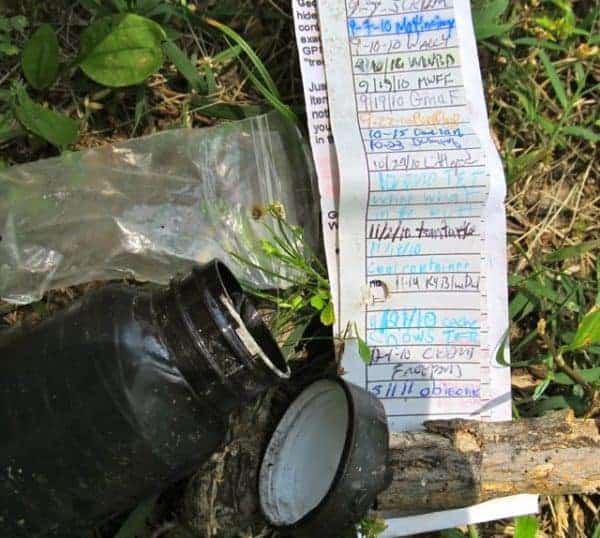
Did you find a geocache? Awesome! Open it up to see what’s inside! You’ll often find a log in the form of a notebook or a long slip of paper (sometimes inside a zippered bag to keep it dry). Sign your name to the log and replace it in the cache container. If the cache contains trinkets, you can take one as long as you also leave something behind for the next geocacher. And, if you’re lucky, you might come across a Trackable (see description above).
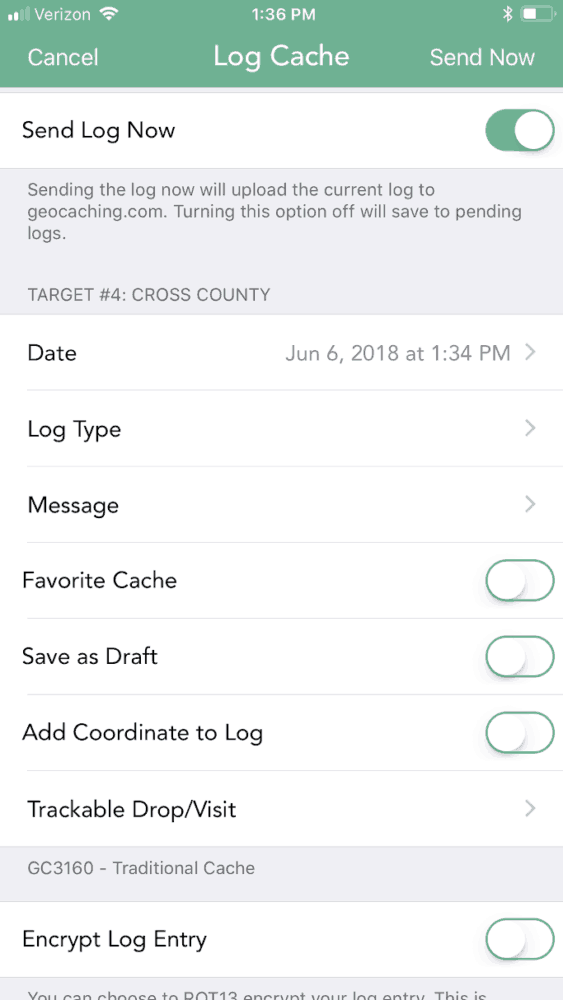
After you discover your cache, be sure to log it in the app. On the cache’s main screen you’ll see a “Log This Cache” at the top of your screen. Click on that. If you want to do so you can leave a message for others that are hunting for this cache (I found it! or Needs Maintenance or Never Found It ). You can also attach a picture you take at the cache. And if you found a Trackable or are leaving a new Trackable, there’s a button for that too. Be sure to hit “Send Now” or “Save for Later” to send your info (or save for later allows you to send it at a later date).
Awesome! I’ll bet you’ll be hooked after your first one. You can find geocaches in cities all over the WORLD.
Geocaching for Beginners Tips:
The first screen that appears when you open your app has a search bar. If you’re planning for a vacation or you’re at home and want to plan out a geocache hunt for later, search by a location other than where you’re currently located by putting a city or zip code in that box.
Bring a pen with you on your hike. Many (perhaps most?) geocaches have a log book inside and most of the geocaches I’ve found do not have a pencil or pen.
Bring a small trinket to leave behind and/or swap. Many geocaches are full of little trinkets to swap. This is especially fun for kids. Things I’ve seen? Small “Dollar Store” items, coins, laminated cards about other geocachers and their favorite events, costume jewelry, etc.
I am going to put together a little bag full of items for geocaching and will keep it in my car. I plan to include a few small pens or pencils and some “Cincinnati” themed goodies to leave behind. I’d love to find some plastic Cincinnati pins or something. I’ll have to keep my eyes open for those!
When you’re looking at the difficulty for a particular geocache, keep in mind that one person’s level of difficulty in “difficulty” and “terrain” may not be in agreement with your standards. I have been on “easy” ones that were tough and “tough” ones that I found easy. It’s just a guide. It is up to you to be safe and to take the necessary precautions on any hunt you pursue. Use YOUR best judgment and don’t rely on what others think.
See some of our other Geocache posts here:
Day 354 – Geocaching in Cincinnati
More Geocaching
This guide is a fantastic resource to the Greater Cincinnati community. Thank you 365Cincinnati for the amazing time and work you have invested!
Jesse T.
-Greater Cincinnati GeoTourism Project Coordinator
Awesome post!! I’ll be trying this on my upcoming day off. Can’t wait! Thank you for the well put together guide. I’ve always thought about trying it, but didn’t know exactly how to start.
Nice article, I see you logged your find on April this year and have only found 6 since then, hope you take your kids or grand kids on this adventure to find more.
thank u for taking the time to do this. It took the intimidation of trying the activity totally put. Im going to do this with my husband for his birthday!!
Hello. I work for the Anderson Park District and we have a geotrail throughout our parks. We are developing our webpage for the geotrail. Could we please link to your guide? It is great!
Thank you for your consideration.